
Paracord bracelets are durable‚ versatile accessories made from high-strength parachute cord. Popular for survival gear and fashion‚ they offer practicality and style‚ making them a favorite DIY project.
What is a Paracord Bracelet?
A paracord bracelet is a durable‚ lightweight accessory made from high-strength parachute cord‚ often Type III 550. Designed for survival and everyday use‚ it can be unraveled to provide cordage for emergencies. Popular among outdoor enthusiasts‚ it combines practicality with style‚ making it a versatile DIY project. The bracelet is woven using various knots and patterns‚ offering customization options for both functionality and aesthetics. Its compact design makes it easy to wear while storing a reliable source of cord for survival situations.
Why Make a Paracord Bracelet?
Creating a paracord bracelet is a rewarding DIY project that combines practical skills with creativity. It offers a fun and challenging activity for crafters of all levels. Paracord bracelets are durable‚ making them ideal for outdoor enthusiasts and survivalists. They also serve as thoughtful‚ personalized gifts. Making one allows you to customize the design‚ color‚ and length to suit your style. Additionally‚ the process teaches valuable knot-tying skills and provides a sense of accomplishment. It’s a great way to prepare for emergencies while enjoying a creative hobby.
Popular Uses of Paracord Bracelets
Paracord bracelets are versatile and serve multiple purposes. They are widely used in outdoor activities‚ camping‚ and survival situations due to their durability and functionality. The paracord can be unraveled to provide strong cordage for emergencies. Fashion enthusiasts appreciate them as stylish accessories‚ available in various colors and designs. They also make practical gifts‚ offering both utility and personalization. Additionally‚ paracord bracelets are used by military and first responders for their reliability and adaptability‚ making them a popular choice for everyday wear and specialized needs.

Materials and Tools Needed
Essential materials include paracord‚ buckles‚ scissors‚ a lighter‚ and a tape measure. These tools enable you to cut‚ shape‚ and secure the paracord effectively for your bracelet.
Paracord Types and Sizes
Paracord is available in various types and sizes‚ with Type III 550 being the most popular for bracelets due to its strength and durability. It features a 550-pound tensile strength and a 4mm diameter‚ making it ideal for knotting. Other types include Type II (300-pound strength‚ 3mm diameter) and Type IV (750-pound strength‚ 5mm diameter). The choice of paracord type depends on the desired strength and thickness of the bracelet. For most projects‚ Type III 550 is recommended for its balance of durability and versatility in crafting patterns and designs.
Buckles and Hardware
Buckles and hardware are essential components for securing paracord bracelets. Common options include side-release buckles‚ shackle buckles‚ and adjustable sliders. Side-release buckles are the most popular due to their easy-to-use mechanism. Shackle buckles offer a more rugged look and are ideal for survival bracelets. Adjustable sliders allow for resizing the bracelet to fit different wrists. Hardware should be durable and compatible with the paracord’s thickness. When selecting buckles‚ consider both functionality and aesthetics to ensure they complement the bracelet’s design and provide a secure fit. Properly attaching the hardware ensures the bracelet’s longevity and usability.
Scissors‚ Knives‚ and Cutting Tools
Sharp cutting tools are essential for trimming paracord cleanly. Use high-quality scissors‚ a utility knife‚ or a specialized paracord cutter. Dull tools can fray the cord‚ making it difficult to work with. For precise cuts‚ heat the blade with a lighter or use a hot knife to sear the ends as you cut. This prevents unraveling and ensures a neat finish. Always cut away from your body for safety. While scissors are the most common choice‚ a sharp knife can be just as effective for trimming excess paracord during bracelet assembly.
Lighters and Heat Sources
A lighter or heat source is crucial for finishing paracord ends neatly. After cutting‚ hold the flame near the cord to slightly melt and seal the fibers‚ preventing fraying. This step ensures durability and a professional look. For safety‚ keep a bowl of water nearby. Avoid overheating‚ as it can weaken the paracord. A hot knife can also sear the ends while cutting. Proper use of heat ensures clean‚ finished edges for your bracelet‚ enhancing both functionality and appearance. Always handle heat tools cautiously to avoid accidents.
Measuring Tools (Tape Measure)
A tape measure is essential for accurately determining wrist size‚ ensuring a proper fit for your paracord bracelet. Wrap the tape snugly around your wrist‚ noting the circumference. Since paracord is thick‚ add a small amount to the measured length to account for the bracelet’s thickness. This step ensures comfort and functionality. Use the tape measure to verify your calculations‚ ensuring the bracelet isn’t too tight or loose. Accurate measurement is key to a successful project‚ making a tape measure an indispensable tool in your DIY kit.
Measuring Your Wrist
Accurately measuring your wrist is crucial for a proper fit. Wrap the paracord around your wrist‚ mark where it meets‚ and note the size. The bracelet should be slightly longer to account for thickness.
How to Measure Wrist Size
To measure your wrist size‚ wrap a flexible measuring tape or a piece of string around the narrowest part of your wrist. Mark where the string overlaps and measure its length in inches. For a comfortable fit‚ add 1-2 inches to this measurement. If using paracord directly‚ wrap it snugly around your wrist‚ mark the overlap‚ and use this as a guide for your bracelet length. This ensures a perfect fit without being too tight or loose.
Calculating Paracord Length
Calculating the paracord length for your bracelet is straightforward. A general rule is to use 1 foot of paracord for every inch of your wrist measurement. For example‚ an 8-inch wrist requires about 8 feet of paracord. However‚ add 10-12% extra to account for knotting and thickness. This ensures your bracelet will be comfortable and secure. Avoid stretching the paracord while measuring‚ as this can lead to an overly tight fit. Proper calculation ensures a well-fitted and functional bracelet.
Adjusting for Thickness
When calculating paracord length‚ consider the cord’s thickness‚ as it affects the bracelet’s fit. Thicker paracord requires slightly more length to ensure comfort. After measuring your wrist‚ add 1-2 inches to the total length to account for the thickness. This adjustment ensures the bracelet won’t be too tight or restrictive. For example‚ if your wrist measures 8 inches‚ using 9-10 inches of paracord ensures a proper fit. Always test the fit before tightening knots to make sure it’s comfortable and secure.
Step-by-Step Guide to Making a Paracord Bracelet
Measure your wrist‚ cut the paracord‚ and fold it in half. Thread through the buckle‚ tie knots securely‚ and tighten. Use scissors and a lighter to finish neatly.
Starting the Project
Begin by measuring your wrist to determine the length of paracord needed. Cut the cord‚ fold it in half‚ and attach it to the buckle. Secure the paracord by threading the folded end through the buckle’s loop. This step ensures the bracelet is properly anchored. Use scissors to trim excess cord and a lighter to seal the ends‚ preventing fraying. With the basics in place‚ you’re ready to start knotting. This initial setup is crucial for a secure and even bracelet.
Creating the Initial Knot
To create the initial knot‚ fold the paracord in half and thread the loop through the buckle. Bring the ends around the back and pass them through the loop to form a cow hitch. Pull the ends tight to secure the knot. This step establishes the foundation of the bracelet. Ensure the knot is snug but not overly tight‚ as it will form the base for subsequent knots. Properly tightening this knot is essential for the bracelet’s stability and structure.
Basic Knotting Techniques
Mastering basic knots is crucial for crafting a paracord bracelet. The square knot is a fundamental technique‚ where strands cross over each other to form a secure bond. The half hitch and lark’s head knots are also essential‚ providing stability and texture. These knots form the backbone of most designs‚ allowing for both functionality and aesthetics. Practice each knot to ensure consistency and tightness‚ as loose knots can compromise the bracelet’s durability. These techniques are versatile and can be adapted to various patterns and styles.
Adding Color and Patterns
Customizing your paracord bracelet with color and patterns enhances its visual appeal. Use different paracord colors to create stripes‚ spirals‚ or multi-tone designs. Techniques like the cobra stitch can be adapted to incorporate two or more colors seamlessly. Layering strands or alternating knots can add complexity to the design. For a personalized touch‚ experiment with contrasting hues or gradient effects. Patterns like the king cobra or diamond weave offer a unique aesthetic. This step allows creativity‚ making each bracelet truly one-of-a-kind in style and design.
Finishing the Bracelet
To complete your paracord bracelet‚ trim the excess cord close to the final knot using scissors or a knife. Carefully burn the cut ends with a lighter to prevent fraying. Ensure the knots are tightly secured for durability. For a polished look‚ tuck any stray strands under nearby knots. Double-check the fit by sliding the bracelet on and off your wrist. If needed‚ adjust the knots slightly for comfort. Your bracelet is now ready to wear or gift‚ offering both functionality and style.
Tightening the Knots
Tightening the knots is crucial for a secure and durable bracelet. Use a needle or pick to gently pull tight each knot‚ ensuring even tension. Avoid over-tightening‚ as this may misshape the design. Once all knots are snug‚ test the bracelet by sliding it on and off your wrist. If needed‚ make micro-adjustments for comfort. For a professional finish‚ tuck any slack under nearby knots to create a clean‚ polished look. Properly tightened knots ensure your bracelet remains intact and functional for years to come.

Advanced Techniques
Explore intricate knotting patterns and designs to elevate your paracord bracelet-making skills‚ creating visually striking and functional pieces for experienced crafters seeking a creative challenge.
Cobra Stitch Tutorial
The cobra stitch is a popular knotting technique for creating durable and visually appealing paracord bracelets. To start‚ fold the paracord in half and attach it to the buckle. Begin by forming a loop on one side and passing the other strand through it to create the first knot. Continue this pattern‚ alternating sides to build the cobra design. Tighten each knot as you go to ensure a snug fit. For a two-color cobra‚ use two strands and alternate colors with each pass. This stitch is versatile and works well for both single and multi-color designs‚ making it a great choice for customizing your bracelet. With practice‚ you can master the cobra stitch and create intricate patterns for your paracord projects.
King Cobra Stitch
The King Cobra Stitch is an advanced version of the cobra stitch‚ offering enhanced durability and a striking appearance. It involves wrapping two strands of paracord around the core‚ creating a double-layered knot. Begin by folding the paracord in half and securing it to the buckle. Then‚ create a loop on one side and pass the opposite strand through it‚ forming the first knot. Repeat this process‚ alternating sides‚ to build the double-layered effect. This stitch is ideal for those seeking a robust and visually impressive bracelet‚ perfect for outdoor enthusiasts and DIY enthusiasts alike.
Two-Color and Multi-Color Designs
Two-color and multi-color paracord bracelets add a creative twist to traditional designs. By using different paracord colors‚ you can personalize your bracelet to match preferences or themes. Start by measuring and cutting the required lengths for each color; Fold the paracords in half and attach them to the buckle. Alternate colors while knotting‚ ensuring even distribution. For multi-color designs‚ simply add more strands‚ weaving them through the knots. This technique allows for endless customization‚ making each bracelet unique and visually appealing. It’s a great way to express individuality or commemorate special occasions.

Customization Options
Customize your paracord bracelet with beads‚ charms‚ or multi-color designs. Experiment with different buckles and patterns to create unique styles that reflect your personality or preferences.
Adding Beads or Charms
Add a personal touch to your bracelet by incorporating beads or charms. These can be threaded onto the paracord before knotting or inserted between knots for a decorative touch. Use a micro cord needle to weave the paracord through bead holes‚ ensuring secure placement. Spacers and intricate designs can enhance the visual appeal. Experiment with metal‚ plastic‚ or glass beads to create unique patterns. This customization allows you to personalize your bracelet‚ making it a one-of-a-kind accessory that reflects your style or serves as a meaningful keepsake.
Using Different Buckle Types
Enhance your paracord bracelet by experimenting with various buckle types. Standard side-release buckles are popular for their ease of use‚ while adjustable shackles offer versatility. Magnetic buckles provide a sleek‚ modern look‚ and decorative buckles can add a personalized touch. Each buckle type alters the bracelet’s functionality and aesthetic appeal‚ allowing you to tailor it to your preferences. Whether for survival practicality or fashion‚ choosing the right buckle elevates your bracelet’s design and usability‚ making it a unique and functional accessory.
Creating Multi-Layered Designs
Multi-layered paracord bracelets add complexity and style to your designs. By incorporating additional strands or intricate stitching patterns‚ you can create textured‚ eye-catching pieces. Techniques like the cobra stitch or king cobra stitch can be layered to form dense‚ woven looks. Experimenting with color combinations allows for unique visual effects. Multi-layered designs not only enhance durability but also offer a personalized touch‚ making each bracelet stand out as a testament to your creativity and skill in paracord crafting.
Troubleshooting Common Mistakes
Common issues include uneven knots‚ loose strands‚ or incorrect length. Tighten knots evenly‚ trim excess paracord‚ and adjust wrist measurements for a perfect fit.
Fixing Uneven Knots
Uneven knots can make your bracelet look unprofessional. To fix this‚ gently loosen the knot by pulling on the surrounding cords. Adjust the tension evenly‚ ensuring all knots align properly. Use a needle or small tool to tighten or loosen specific areas without damaging the paracord. If a knot is too tight‚ carefully pry it open with a flat tool. For loose knots‚ wrap the cord around the buckle tighter and retie. Regularly inspect your work as you go to maintain consistency. This step ensures a polished‚ professional finish.
Adjusting Bracelet Length
Adjusting the length of your paracord bracelet ensures a perfect fit. If the bracelet is too tight‚ loosen the knots slightly by gently pulling on the paracord. For a bracelet that’s too loose‚ tighten the knots by pulling the cord firmly. To fine-tune‚ soak the bracelet in water‚ which causes the paracord to shrink slightly. After soaking‚ let it dry to achieve a snug fit. Always measure your wrist beforehand to avoid significant adjustments later. A well-fitted bracelet is both comfortable and functional‚ making it ideal for everyday wear or survival situations.
Repairing Damaged Paracord
Repairing a damaged paracord bracelet involves a few simple steps to restore its durability and appearance. Start by identifying the damaged section and cutting it out with scissors or a sharp knife. Use a lighter to carefully burn the cut ends to prevent fraying. Then‚ unravel the paracord to access the inner strands. Re-weave the strands into your bracelet‚ ensuring tight knots to maintain strength. If the damage is extensive‚ consider replacing the paracord entirely. Regular inspections and timely repairs will extend the life of your bracelet‚ keeping it functional and visually appealing.

Safety Tips
Always handle sharp tools with care and use heat sources safely to avoid burns and ensure a secure paracord bracelet. Proper safety precautions protect both you and your project.
Handling Sharp Objects
When cutting paracord‚ always use scissors‚ knives‚ or heat tools with caution. Ensure blades are sharp to avoid accidents and keep fingers away from cutting edges. Cut on a stable‚ flat surface and maintain control. When melting ends with a lighter‚ hold the flame briefly to prevent excessive charring. Keep sharp objects out of reach of children and store them safely when not in use to minimize risks of injury or damage.
Using Heat Safely
When using heat sources like lighters to melt paracord ends‚ ensure the area is well-ventilated and free from flammable materials. Hold the flame steadily but briefly to avoid charring the cord. Keep heat tools away from children and never leave them unattended. Always test the heat on a small section first to gauge the desired effect without damaging the paracord. Properly extinguish flames after use to prevent accidents.

Project Variations
Explore beyond bracelets with paracord watch bands‚ keychains‚ and pet accessories. Create leashes‚ collars‚ or even decorative items like shoelace charms‚ adding functionality and style to everyday items.
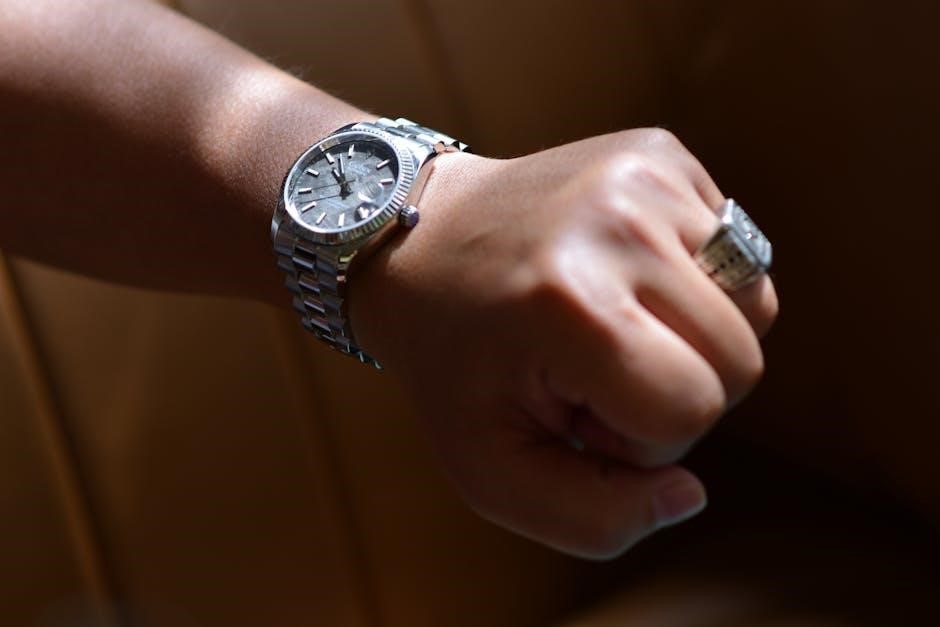
Paracord Watch Bands
Paracord watch bands are a practical and stylish variation of the classic bracelet. Using similar knotting techniques‚ they provide a durable and adjustable strap for watches. Measure your watch strap area‚ cut the paracord accordingly‚ and weave it using a cross knot or cobra stitch pattern. This project requires about 2-3 feet of 550 paracord and a buckle or shackle. The result is a rugged‚ customizable accessory that combines functionality with survival-ready durability‚ perfect for outdoor enthusiasts and everyday wear.
Keychains and Zipper Pulls
Paracord keychains and zipper pulls are practical and customizable accessories. Using basic knotting techniques‚ you can create durable attachments for backpacks‚ jackets‚ or keys. These small projects require minimal materials‚ such as a short length of paracord and a few simple tools. They are ideal for beginners‚ offering a quick way to practice knots and patterns. Add beads or charms for personalization‚ making them unique gifts or DIY crafts. Their compact size and functionality make them perfect for everyday use or survival gear‚ ensuring lasting durability and versatility.
Leashes and Pet Accessories
Paracord leashes and pet accessories are durable and versatile‚ making them ideal for active pets. Using 550 paracord‚ you can create sturdy dog leashes or horse leads with minimal materials. Simply measure the desired length‚ braid or knot the paracord‚ and attach a swivel snap or bolt clip. These accessories are both functional and stylish‚ offering resistance to wear and tear. Customize colors and patterns for a unique look. Paracord leashes are lightweight‚ easy to clean‚ and perfect for outdoor adventures‚ ensuring reliability and comfort for both pets and owners.
Creating a paracord bracelet is a fun‚ rewarding DIY project that combines functionality with style. It offers a sense of accomplishment and makes a thoughtful‚ personalized gift.
Benefits of Making Your Own Paracord Bracelet
Making your own paracord bracelet offers numerous benefits‚ including the ability to customize designs‚ colors‚ and patterns to suit personal preferences. It’s a cost-effective DIY project that also serves as a useful survival tool. The process enhances creativity and hand-eye coordination while teaching valuable knot-tying skills. Additionally‚ crafting a paracord bracelet allows for personalization‚ making it a thoughtful gift for friends and family. The sense of accomplishment from creating something functional and stylish is rewarding‚ and it encourages self-sufficiency and resourcefulness.
Encouraging Others to Try
Encouraging others to make paracord bracelets fosters creativity and practical skills. It’s a fun‚ rewarding DIY project that can be enjoyed by people of all ages and skill levels; Sharing the process with friends or family promotes bonding and learning. The sense of accomplishment from creating something functional and stylish is motivating. Additionally‚ it introduces others to the versatility of paracord‚ highlighting its uses in survival and everyday applications. This hands-on activity is both educational and enjoyable‚ making it an ideal hobby to share with others.

Additional Resources
Explore numerous online resources‚ including printable PDF tutorials‚ detailed YouTube video guides‚ and active paracord communities for tips‚ inspiration‚ and troubleshooting. Websites like Pinterest and Facebook groups offer extensive libraries of paracord bracelet instructions and creative ideas to enhance your projects.
Printable PDF Tutorials
Printable PDF tutorials provide step-by-step instructions for making paracord bracelets‚ offering clear visuals and detailed guides. These resources often include various project ideas‚ from simple survival bracelets to intricate designs. Many websites and crafting communities offer free or paid downloadable PDFs‚ making it easy to follow along at home. Whether you’re a beginner or an experienced crafter‚ these tutorials are indispensable for mastering different stitching techniques and exploring creative patterns. They are a great way to learn new skills and expand your paracord project repertoire.
YouTube Video Guides
YouTube offers an abundance of video guides for making paracord bracelets‚ providing visual step-by-step instructions. These tutorials are perfect for visual learners‚ covering various techniques‚ from basic knots to intricate designs. Many channels specialize in paracord crafts‚ offering detailed demonstrations for projects like the cobra stitch‚ king cobra‚ and multi-color designs. Videos often include tips for troubleshooting common mistakes and customizing bracelets. Whether you’re a beginner or an experienced crafter‚ these guides are an excellent resource for mastering paracord bracelet-making skills and exploring creative ideas.
Paracord Communities and Forums
Paracord communities and forums are vibrant spaces where enthusiasts share ideas‚ tutorials‚ and tips. These platforms are ideal for connecting with experts and fellow crafters‚ offering a wealth of knowledge and inspiration. Many forums feature detailed project guides‚ troubleshooting advice‚ and discussions on advanced techniques. Members often share photos of their creations‚ providing visual inspiration for new projects. Whether you’re a beginner or an experienced crafter‚ joining these communities can enhance your paracord bracelet-making skills and help you discover fresh designs and ideas to try.